Repair a cable in a few simple steps
Materials needed:
- A small spring (recovered from an old pen or charger)
- Hot glue (and a glue gun)
- A pair of scissors
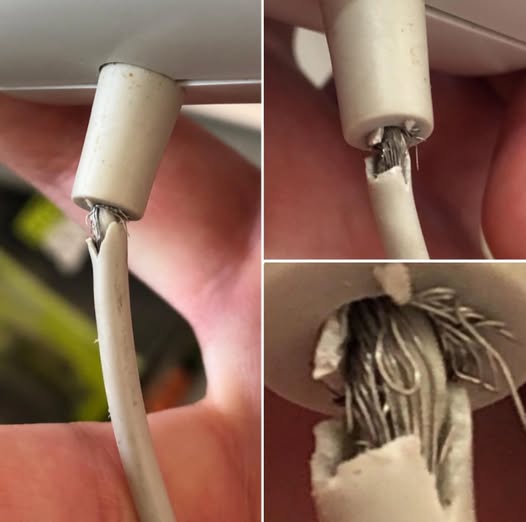
Step 1: Locate the damaged area
Often, the problem is near the connector. If the cable is badly damaged, cut just above the damaged area.
Step 2: Thread the spring
Gently slide the spring around the area to be reinforced. It should cover the critical area well, like a sleeve protecting an arm.
Step 3: Apply hot glue
Coat the spring with hot glue, without touching the internal wires. Let it cool completely. This layer will solidify the structure and absorb future stress.
Step 4: Leave the end free
Do not completely cover the spring. A small, unglued portion will maintain essential flexibility to prevent further breakage.
Step 5: Test your cable
Once cooled, try charging your device. If everything works, you’ve just extended the life of your cable by several years!
Why this method changes everything
- Enhances durability : The spring acts as an exoskeleton. It absorbs movement, prevents critical bends, and protects the fragile area.
- Economical : A spring and a little glue, that’s all. No purchase necessary. It’s French DIY : clever, practical, and affordable.
- Eco-friendly : Every cable repaired means one less cable in a landfill. A small gesture, but a big step towards reducing electronic waste.
Continue on the next page